We’ve all been there: you’re mid-dinner, flicking a switch, and suddenly the ominous *pop* of a broken light bulb fills the room with an unsettling darkness. The last thing you want is to grapple with shards of glass while wrestling with the stubborn remains of a light bulb. Fortunately, I’ve got a straightforward solution that’s as ingenious as it is simple: use a potato! Yes, you read that right. This isn’t just a quirky DIY tip; it’s a brilliantly practical approach to remove broken light bulbs safely that every homeowner should know.
Highlights
- 🔌 Power Down: Ensure safety by turning off the circuit breaker.
- 🥔 The Potato Method: A surprising, yet effective way to grip and unscrew broken bulbs.
- 👷♀️ Safety First: Always wear gloves and goggles when handling broken glass.
- 🔄 Alternative Techniques: Options if the potato method doesn’t cut it.
Did you know? Using a potato to remove a broken light bulb isn’t just a DIY trick; it’s backed by electricians as a safe alternative! 🛠️
Why This Method Works
Let’s cut to the chase: broken light bulbs can be both frustrating and dangerous to remove. The remnants of glass left in the socket can be precarious, and introducing your hands or sharp tools poses a risk of injury. By using a potato, you leverage its natural texture to create a firm grip on the bulb base without direct contact with the glass. It’s all about working smart, not hard.
On the surface, this may sound odd, but think about it. A potato, especially when halved, provides a soft yet sturdy surface that can conform to the jagged edges of the broken bulb. This ingenious method has become a go-to tip among electricians, and for good reason! You can avoid cuts and even the possibility of electric shocks if you’ve turned off the power correctly.
Steps to Remove a Broken Bulb with a Potato
Ready to get started? Here’s a step-by-step guide that’ll walk you through the entire process. Grab your potato and let’s get to it!
- 🔌 Turn Off the Power: Go to your circuit breaker and ensure the power is completely shut off instead of just toggling the light switch.
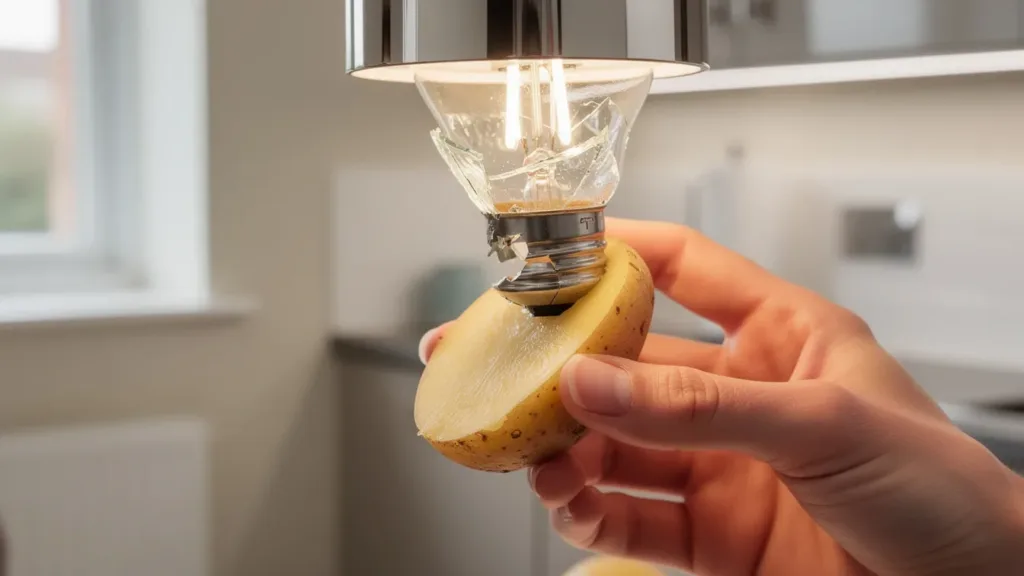
- 🥔 Cut the Potato in Half: Choose a potato that fits well over the bulb base. Cut it in half to expose a fresh surface.
- 💪 Press and Twist: Firmly press the flat side of the potato onto the broken bulb’s base and twist counterclockwise. Apply pressure, but avoid crushing it.
- 🌟 Careful Extraction: If you’ve done it right, the potato should unscrew the bulb base without too much trouble. If it feels stuck, don’t force it!
And voila! Just like that, you’ve managed to remove a broken bulb with a humble potato. Who knew such a simple kitchen staple could be a homeowner’s best friend?
When the Potato Method Fails
Sometimes, even the best solutions don’t yield results. If you find the potato isn’t doing the trick, don’t despair—there are other methods to try. Needle-nose pliers can be a life-saver here. Carefully grip the edges of the bulb and twist it out slowly—remember, patience is key!
Alternatively, if you haven’t got pliers handy, trying wrapping the end of a rubber band around your fingertips can create more grip. You’d be surprised how effective this can be in getting a hold on those slippery fragments!
After the Removal: Cleaning the Socket
So, the bulb is out, but let’s not neglect the aftermath. It’s essential to inspect the socket for any remaining glass shards. A soft cloth or compressed air can remove stray pieces without causing further damage. Setting up your new bulb in a clean socket is not just a good practice, but vital for safety.
Make sure to check for cracks or signs of wear—damaged sockets can lead to further electrical issues or even more broken bulbs down the line!
Prevent Future Breakdowns
Want to avoid this situation in the future? Simple! When installing new bulbs, hand-tighten them without cranking too hard; trust me, over-tightening is a common culprit for future breakages. Opting for LED or shatterproof bulbs can also reduce the chances of a mess. These durable options have longer lifespans and are resistant to breaking.
Think of it this way: a little prevention can go a long way in making your home safer.
Get Hands On with DIY Safety!
There you have it: a practical and safe method to tackle those pesky broken light bulbs using a potato! ✨ I encourage you to give this tip a try the next time you find yourself in a dimly lit predicament. Remember to take your time and prioritize safety. Check back for more clever tips and tricks to make your DIY adventures a breeze. Trust me, you’ll be glad you did!
It’s a game-changer, combining humour with genuine utility. The next time you encounter a broken bulb, you’ll definitely want to keep a potato close at hand. Happy fixing!